You are using an out of date browser. It may not display this or other websites correctly.
You should upgrade or use an alternative browser.
You should upgrade or use an alternative browser.
Sngine The Ultimate PHP Social Network Platform
- Thread starter Proxybunker
- Start date
You will find most answers to your questions here in the official sngine documentation

Sngine - Documentation
Sngine is a Social Network Platform is the best way to create your own social website or online community. Launch it in just 1 minute with ultimate features. It’s fast, secured, and it will be regularly updated
 codecanyonscripts.com

Sngine - Documentation
Sngine is a Social Network Platform is the best way to create your own social website or online community. Launch it in just 1 minute with ultimate features. It’s fast, secured, and it will be regularly updated
How to update to a new version of sngine
!!! IMPORTANT !!!
==============================================================================================================
== Backup your database and your website files just in case something wrong happened ==
== Uninstall any Sngine plugin(s) from your Sngine both files and any database changes made by this plugin ==
== If you can't do it ask the plugin author(s) for support and help ==
==============================================================================================================
You can check our video tutorial from here:
Note: Make sure you are running on the default Sngine theme
1- Shutdown your system from the admin panel
2- Upload all files located in the "Script" folder and replace all files and folders, Except:
-- content/backups (folder)
-- content/uploads (folder)
-- includes/config.php (file)
3- Copy "update.php" file from "Update 3.12 to 3.13" folder to your server
4- Run the "update.php" file (http://yourdomain.com/path_to_script/update.php)
5- Empty this folder "content/themes/default/templates_compiled"
6- Remove any browser cache and cookies ( Check this to learn how: https://bit.ly/SngineClearCache )
7- Only for Cloudflare users, Don't forget to flush your website cache from Cloudflare
8- Go to your admin panel (http://yourdomain.com/path_to_script/admincp) and make site live again
9- Delete "update.php" from your script folder after updating
And That's it, Have Fun
Setting up mailgun as your email provider within sngine
Here is also a video showing the same setup as below
If you have not already done so register for an account on mailgun.com Once you have this part done and you have activated your account login to mailgun and on the left-hand site you will see
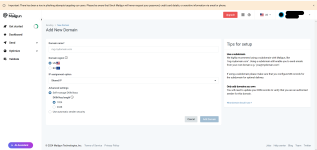
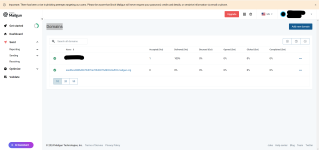
Open the send option then Sending and Domains add your domain


You will now be presented with the DNS setting for your domain you must enter them with your domain registrar and verify them as seen in the images


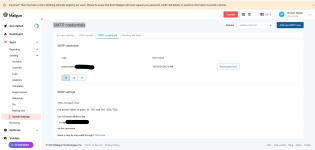
Now on the left navbar after you verify your domain DNS setup go back to the domain setting and this time click on the SMTP credentials
and reset your email password or Add A New SMTP User it up to you

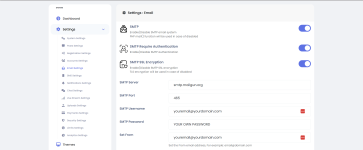
After you have done all this go to the admin within your sngine and enter the information

Save and test it should all be working now


